Combining Auth0 and Angular 6, Part 2
Security is hard. The advice is to “Not Roll Your Own”. Last post we talked about the concepts involved in the Implicit Flow. This part is all about The Code!
Note: this is part 2 in a series of posts:
- The “About” part, describing all moving parts and processes.
- The “Gimme-teh-codez” part, that walks you through the code. (this post)
Let’s Code
In the previous part we discussed the OAuth2 Implicit Flow. But code is a more efficient way of communicating, don’t you think? So let’s get to it!
If you’re here just for the code: no problem! To get a full example of how the client side library is supposed to work, you should check out the sample-angular-oauth2-oidc-with-auth-guards repository, which has a production-worthy example of how to use the library. It would need to be reconfigured to use Auth0 however. So if you want to see a minimal example of how to use it with Auth0, check out this post’s companion repository.
But nothing beats building it yourself. So here we go.
Prerequisites
To follow along, you need these things:
- Node (tested with 10.8.0) and NPM (tested with 6.3.0)
- Angular CLI (tested with 6.1.5)
- An IDE (VS Code is nice for Angular coding)
- A shell (Powershell or Bash will do)
In addition you will need an Auth0 account. You can create one now, or when we get to that part.
Angular setup
Let’s start with this:
This should open a default, minimalistic Angular application. It leaves the console waiting for hot-reload requests. Next, open the DemoApp folder in your editor, and replace app.component.ts with this:
Your app should look somewhat like this (if you steal some of these styles):
Adding angular-oauth2-oidc
This section documents the steps to add the client side library. It’s adapted from the library’s readme, and the approach used in the production-usage sample repository. Start with this on the command line:
Changing the app.module
Next, go to app.module.ts and make these changes:
Some things we’ll get back to once we have our Auth0 account set up.
Changing the app.component
Now let’s adjust the app.component.ts file:
Let’s investigate what’s being changed, top to bottom. First, the token and claims properties now forward to the OAuthService. They’re just for debugging purposes.
Next, the constructor gets some good ‘ole console debugging to assist while coding. It also has a “promise chain”, starting with the loading of the discovery document (you could also manually enter your ID Server’s config in the app, to win a bit of loading speed). This chain continues to do tryLogin, which inspects the browser URL to see if the hash fragment contains tokens (after a redirect back by Auth0). This will also clear the hash fragment.
In typical production apps, this “chain” will be much longer. I would suggest adding an attempt to do a “Silent Refresh” to see if you can log in that way. And there are many other niceties too. Check out this example repository to see what such a chain would look like. For now, we’ll stick with this simple setup.
Finally, in the app.component, there are three methods that are just proxies for OAuthService methods.
Silent Refreshes
To get silent refreshes to work, we need to do one more thing. Add a file silent-refresh.html next to your index.html file, with these contents:
To understand why and how this works, consider how a silent refresh works for the library. In order, this will happen:
- When a silent refresh is needed (requested, or on a timer), a hidden iframe is created.
- That iframe is directed to Auth0, passing along (a) an instruction that no user interaction is possible, and (b) the URL of the
silent-refresh.htmlfile for redirecting the user back. - The ID Server sees the iframe, uses cookies (if any) for its domain, and checks if the user is logged in.
- The ID Server will redirect that iframe back to the silent-refresh URL, using the hash fragment to indicate failure to log in, or otherwise passes along an access token.
- The html above loads in the iframe, and communicates to its parent (your app!) what was passed along in the hash fragment.
To get this file served as part of your Angular app, you need to add it to the angular.json file:
Important: you have to restart ng serve for this change to be picked up!
Setting up Auth0
First things first, go sign up for Auth0.
Creating the Client
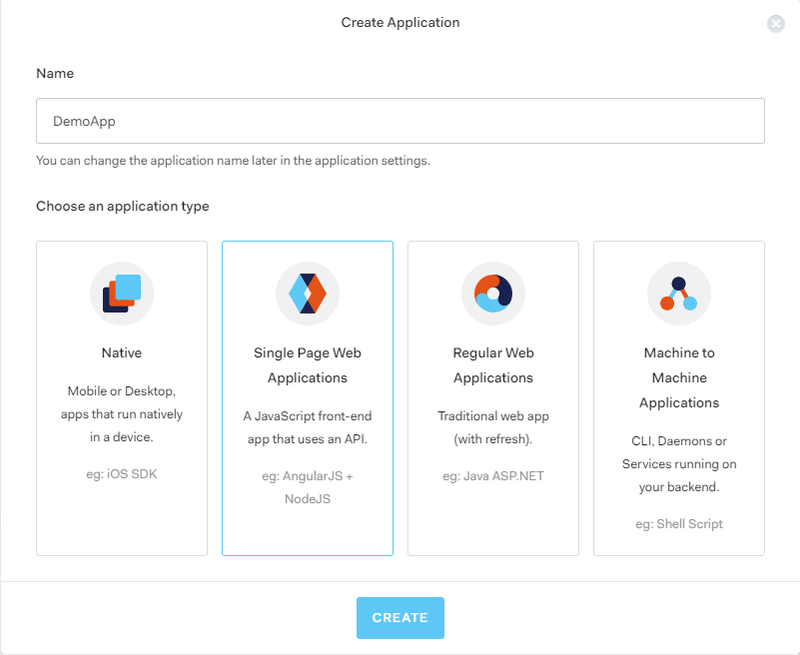
Next, go to manage.auth0.com/#/applications to create a Client. Hit “Create Application”, name it “DemoApp”, and select “Single Page Web App”:
Skip the “Quick Start”, and open the “Settings” tab. Take care of these base settings:
- Set “Allowed Callback URLs” to
http://localhost:4200/, http://localhost:4200/index.html, http://localhost:4200/silent-refresh.html - Set “Allowed Logout URLs” to
http://localhost:4200/, http://localhost:4200/index.html - Note the “Client ID” (not the secret), you will need it later.
- Note the “Domain”, you will need it later.
Then open up the “Advanced” settings at the bottom. Go to the “Grant Types” tab and note that the “Implicit” flow is checked (you could uncheck others, if you want)
Creating the Resource (API)
Go to manage.auth0.com/#/apis to create an API. Hit “Create API”, name it “DemoApi”, and give it an Identifier. As explained in the Auth0 UI, this should be a URI to identify your Resource API. For example, we used https://auth0-demo-001.infi.nl:
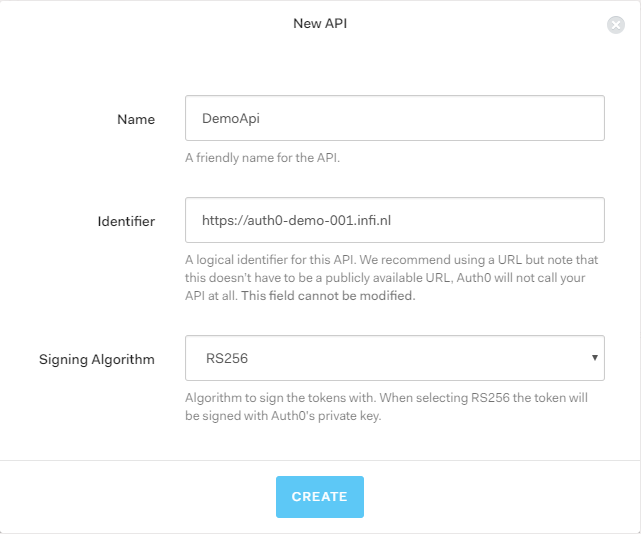
Note the Identifier (a.k.a. “issuer”), you will need it later.
Connecting the dots
Now that we have both ends set up, we need to connect them. Let’s start by editing the AuthConfig we created earlier:
- Set the
issuerto your Auth0 domain (withhttps://added), e.g.https://jeroenheijmans.eu.auth0.com - Set the
clientIdto the one mentioned in the dashboard of Auth0 - Set the
audiencein yourcustomQueryParamsto the identifier you chose earlier
That’s it! Reload your application (if needed), with devtools open, and you should see this:
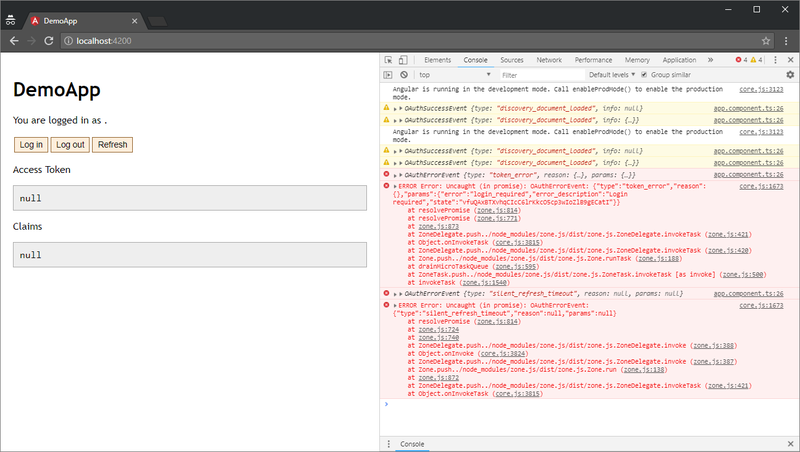
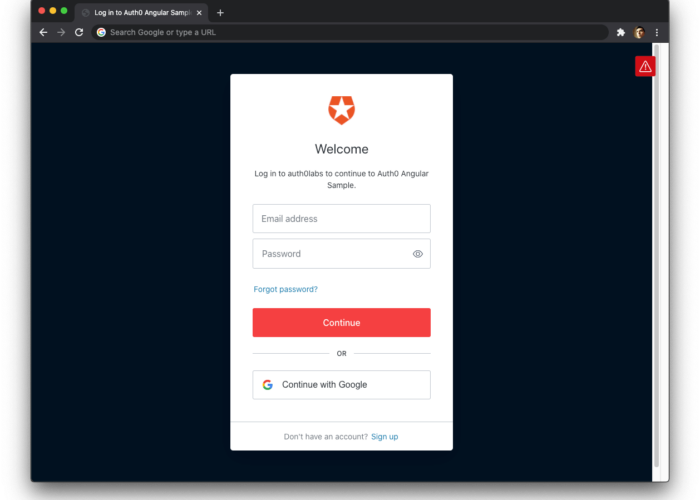
Don’t worry about all the red bits! It’s supposed to be like that (for now). Try hitting the “Log in” button now, and in the subsequent Auth0 screen, choose “Sign Up”:

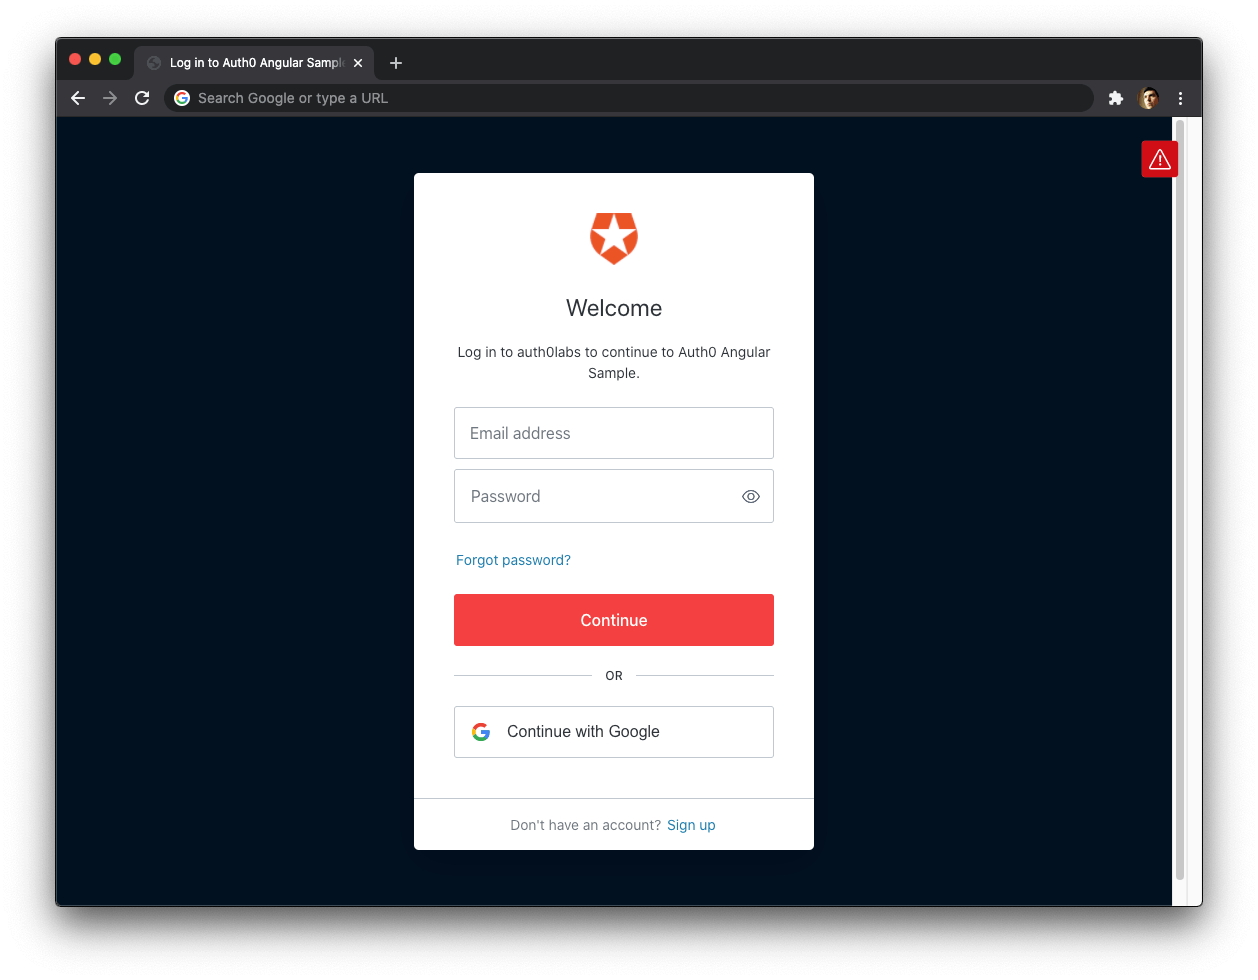
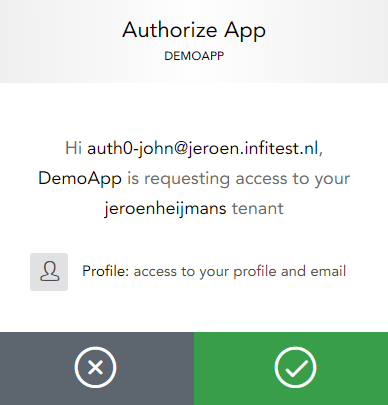
Then authorize our Angular application:
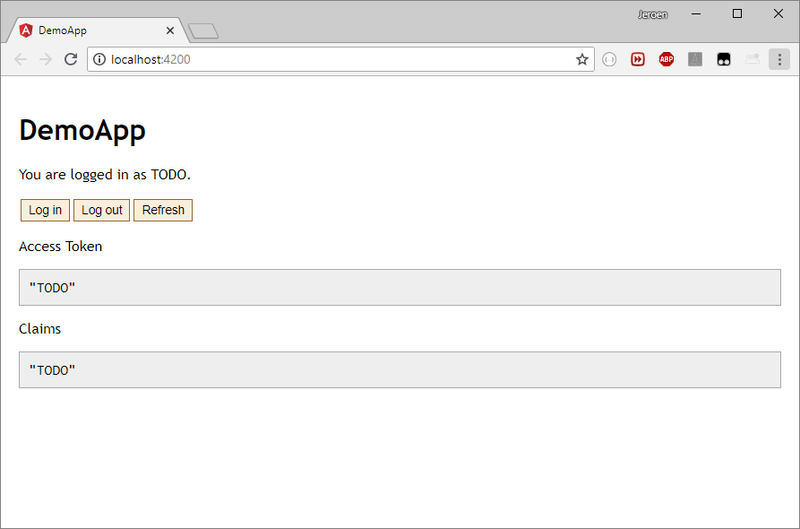
You get redirected back to your Angular application, with tokens in the hash fragment. Before you can probably spot it, our code will log you in and clear the fragment. You should see something like this:
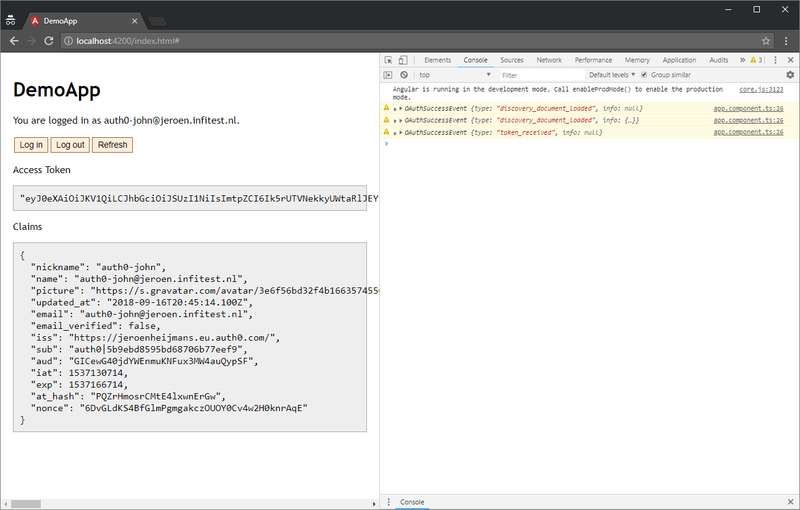
You’re all logged in and good to go!
Conclusions
Security is hard. OAuth2 and OpenID Connect make things even more complex. But we can bring the complexity back down a bit again by using existing components, as well as a SAAS solution like Auth0.
In these posts you’ve learned the very basics of setting up Angular and Auth0. We brought them together, ending with a simple but effective complete package.
These examples were only the basics. The client side logic calls for many other more advanced features, including:
- AuthGuards for protecting routes
- Extended login mechanisms, trying to be as user-friendly as possible
- Handling edge cases and problems
- Enabling session checks (push notifications from ID Servers about Single Sign Out)
- External login providers (“log in with Google”, etc.)
- Cross-browser-tab (or window) notifications of events like sign out
- Loading user profiles with additional identity information
- Preserving state (like target URL) before initializing Implicit Flow
If you want to see how all these things work, you should go to this example repository. If you clone it and reconfigure it (change issuer and clientId, add customQueryParams), you should be able to “just” connect it to your own Auth0 account, and see how it works.
Hopefully this post was helpful to you. It certainly was educational to write it.